Option 1 - Punish everyone by canceling stuffing, pie, and other Thanksgiving favorites.
Option 2 - Punish those afflicted with Celiac for developing such an inconvient disease.
OR
Option 3 - Enlist Jennifer from The Adventuresome Kitchen, an amazing gluten free blog, to develop some fantastic recipes for a few Thanksgiving favorites that everyone at the table can enjoy.THANKSGIVING NIRVANA
 Hello Lindsey Evenson fans! I’m thrilled to be sharing my very first guest post ever over here at Lindsey’s site. Lindsey is such an entertaining writer and an inspiration to those of us who spend our days juggling home life, parenting, cooking and pursuing our passions. Lindsey- you make it seem so easy!
My name is Jennifer- I blog at The Adventuresome Kitchen- a site dedicated to de-mystifying gluten-free cooking with delicious and fun recipes, while encouraging people to get adventurous in the kitchen. I strive to create incredible food that just happens to be gluten-free. Now, let’s talk turkey! Or at least stuffing!
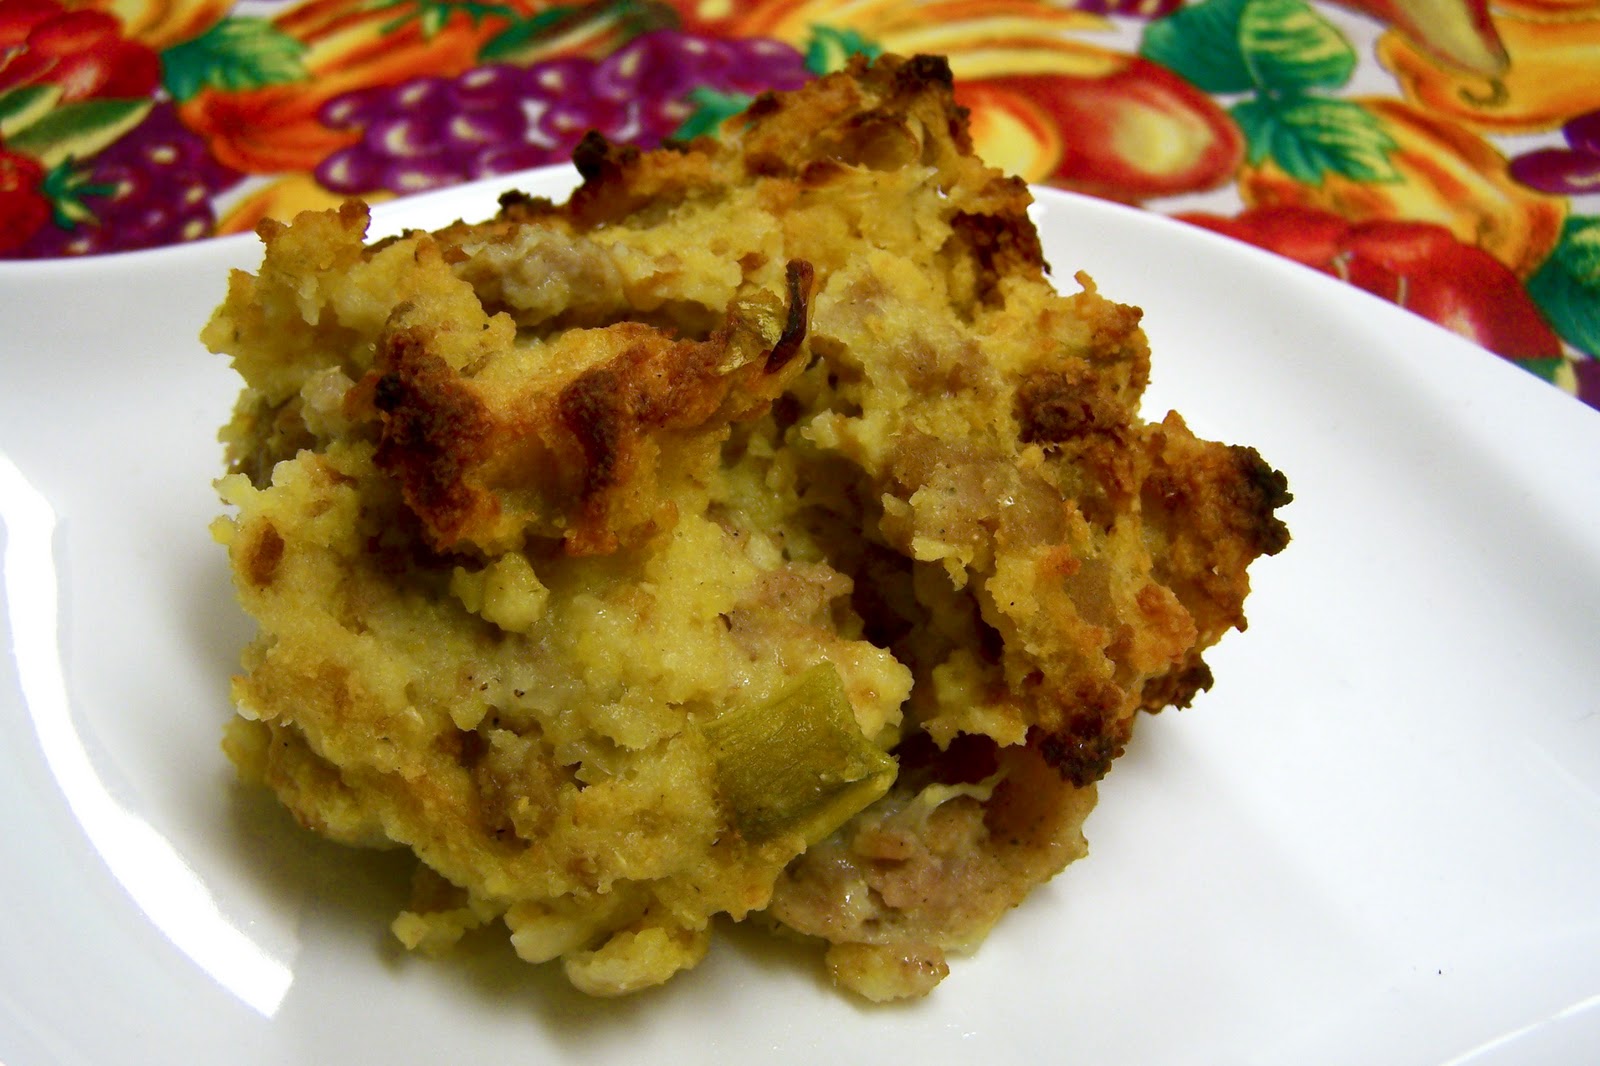
Lindsey thought it would be great to concentrate on the two biggest gluten bombs on the Thanksgiving table, stuffing and pie.
Cornbread, Sausage and Green Chile Stuffing

12-14 nice sized servings -gotta have leftovers, right?
Ingredients
1 pan of gluten-free cornbread - you can make this from a mix, or follow my simple recipe below
1 lb sausage
½ yellow onion, diced
1 cup chopped roasted green chiles -If you don’t have these in your freezer, you can usually find “Hatch Green Chiles” in the Ethnic food aisle at your local grocer.
8 oz plain goat cheese
2- 3 cups chicken stock, heated The variation in liquid comes from how fresh the cornbread is. If you use piping-hot cornbread fresh from the oven, you will need less liquid. If you use day old cornbread, or even stale- which is ok- you will need more liquid. Use your judgment.
Directions
 Easy Gluten Free Cornbread
 makes 16 squares
Ingredients
1 cup + 2 tbs corn flour corn flour is a finer grind than cornmeal, but cornmeal is also ok
1/2 cup millet flour
6 tbs tapioca starch also called tapioca flour
2 tsp xanthan gum this is a binding agent and very important
2 heaping tsp baking powder
1/2 heaping tsp baking soda
1 1/3 cup buttermilk it’s also ok to use a combination of milk & buttermilk
2 eggs
2 tbs honey or maple syrup
Directions
Preheat oven to 425. Lightly grease a 9×9 square pan. No need to do this if you have clay, or nonstick bakeware
In a medium bowl combine the dry ingredients. In a separate bowl, mix the wet ingredients.
Add wet ingredients to dry and stir until just incorporated.
Pour mixture into the baking dish and place in the oven. Bake for about 20 minutes or until a toothpick comes out clean. Enjoy with honey, butter, jam, or your favorite condiment. Or in this case, use for stuffing!
White Bread Stuffing with Pancetta, Fennel & Cranberries
Makes 14-16 nice sized servings

Ingredients
1 loaf of gluten-free bread, ripped into 1 inch pieces (about 8 cups)- if you can find it, I prefer Canyon Bakehouse or Udi’s
½ lb pancetta
1 cup finely diced shallots
1/2 cup finely diced carrots
1 cup chopped fennel
½ cup white wine
1 ½ cups dried cranberries
4 tbs fresh finely chopped parsley
4 tbs fresh finely chopped sage
2-3 cups chicken stock, heated Again- the amount of liquid needed depends on how dry the bread is- if you’re using dried bread, you will need more liquid than if you’re using fresh bread.
Directions
Preheat the oven to 375. With your kitchen shears, snip pancetta into small squares I find this easier than my knife, but really it’s up to you and add it to large sauté pan I like my cast iron skillet that has been placed over medium heat. Allow the pancetta to cook so that most of the fat has rendered and the bits are golden brown and crispy- about 15 minutes. Add the chopped shallot, carrot and fennel, and stir to combine. When the shallots are translucent, the carrots and fennel have softened, and the pan is beginning to dry a bit, add the white wine. Allow the mixture to bubble on the stove for about 2 minutes and add the cranberries. You still want there to be some liquid left when you add the cranberries, as this will help them to plump.
Meanwhile, in a separate large bowl, rip your gluten-free bread into small pieces. Gluten Free loaves are typically smaller than traditional loaves- it usually takes about 12 pieces of gluten-free bread to make 8 cups.
Back at the pan- when all the liquid has been absorbed by the cranberries, and the mixture is beginning to dry again- pour it onto the bread and gently mix. Add the chopped herbs and gently mix again. Slowly add the chicken stock by ½-cups and gently incorporate until all the liquid has been absorbed. This stuffing is a twist on a traditional breadcrumb stuffing, and you don’t want the super-mushy consistency that you’ll get in the cornbread stuffing. You want the pieces of bread to be saturated, but still looking like pieces of bread. Transfer to a baking dish and bake for one hour at 375- until the top is brown and crispy and the texture is similar to a bread pudding. This tastes especially good if you bake it the day before you eat it and allow the flavors to marry overnight. Reheat and serve.
And now for dessert………
Easy Gluten-Free Pie Crust
makes 2 8-9 inch crusts
Ingredients
3/4 cup sweet rice flour
3/4 cup tapioca starch
1/2 cup almond flour
1/4 cup potato starch
1 tsp xanthan gum
1 tsp salt
2 tbs sugar
4 oz butter (8 tbs)-chilled
4 oz vegetable shortening (8 tbs)-chilled
5-7 tbs chilled ice water
3+ tbs cornstarch (for kneading)
Directions
These directions have been created using a food processor. If you don’t have a food processor, I recommend freezing the butter/shortening and grating it into the dry mixture for faster mixing, or taking 2 knives and cutting it into the dry mixture the old fashioned way. Whatever way you choose to prepare the crust, it will taste delicious. Remember-the amount of liquid you need will vary depending on how warm/humid your kitchen is. If the dough is too mushy you can work in more flour during the kneading phase.
Place all dry ingredients except the cornstarch in the food processor and pulse three times to blend. Cut the chilled butter and shortening into tablespoon sized pieces and add evenly to the flour mixture. Pulse approximately ten times, or until butter/shortening has been reduced to pea-sized amounts or smaller. Drizzle the ice water by tablespoonfuls over the mixture. Pulse approximately 25-30 times, or until mixture has formed into a ball. Remove from the food processor.
On a wooden cutting board, or a piece of parchment paper, place a sprinkle of cornstarch. Place the dough ball on the surface and sprinkle with one tablespoon of the cornstarch. Knead with the heel of your hand, pressing dough down and across surface. Re-form into a ball and knead again. When the cornstarch has been worked into the dough, sprinkle an additional tablespoon over the dough ball and repeat until all three tablespoons have been incorporated into the dough. The kneading helps mash the butter/shortening into the flour, thus creating a crispy, melt-in-your mouth crust. If the dough is super mushy, keep working in more cornstarch until you can pick the dough ball up and shape it with your hands without it sticking to your fingers. Separate the dough into two balls, flattening each slightly with your hand, and sprinkle each with a little cornstarch. Wrap each flattened ball in parchment, waxed paper, or plastic-wrap, and refrigerate for at least two hours. The dough will keep at least a week.
When dough is ready to be rolled, place a large piece of parchment paper on the counter and sprinkle with cornstarch. Rub cornstarch on a second piece of parchment and place cornstarch side down on top of the dough. You can also sprinkle additional cornstarch on the crust. Since this dough has no gluten, it’s much softer and more delicate than a regular pie crust. You need to work quickly while the butter/shortening is still cold. Roll the crust to 1/8 inch thick, and approximately 2 inches beyond the width of the pie plate. To transfer to the pie plate, pick up the parchment and once it’s over the plate, flip the parchment over, gently placing the crust on the plate. With your fingers, arrange the crust to your liking, and crimp the edges. If your crust cracks: Simply mush together with your fingers- no need to use a dab of water to ‘glue it’. The pie crust is very forgiving, but also pretty durable. If you like- place the pie pan in the fridge for a few minutes before adding the filling to chill up the butter. If you’re using a glass pie pan don’t leave it in too long. You don’t want the sudden change in heat to crack your pan when you place it in the oven.
If you’re baking the shell prior to filling it: Preheat the oven to 375. Grease a piece of parchment paper and place it greased-side down on the pie crust. Gently press the paper to the edges of the crust, and fill with marbles, dried beans, or coffee beans. Allow to cook for 15-20 minutes. At this point you can remove the parchment and prick the bottom of the crust with a fork and bake for another 5-10 minutes, or until it’s a color you like (light gold-dark gold) If you need- place a pie ring around the top of the crust to prevent over browning.
And Last- but not least……….
This is my grandmother’s pie recipe. The extra spices make the pie more brown than orange, but I think you’ll appreciate the result.

Oma’s Pumpkin Pie (or the best pumpkin pie ever!)
Makes 1 9-inch pie
Ingredients
1 ½ cups mashed pumpkin (1 can)
1 cup brown sugar
¾ cup milk (whole or evaporated ) or egg nogg
2 eggs
½ tsp salt
1 ½ tsp cinnamon
¾ tsp cloves
¾ tsp nutmeg
Directions
In one bowl add pumpkin, brown sugar, and spices. Separate egg yolks from egg whites and add yolks to the pumpkin mixture. Mix, and slowly add the milk to the mixture.
In a separate bowl, beat egg whites until white and frothy (before soft peak stage)
Gently fold egg whites into pumpkin mixture, and pour batter into a 9 inch pie pan.
Cook in the lower third of the oven at 425 for 15 minutes. Lower temperature to 350, and cook an additional 40 minutes- until the center of the pie slightly jiggles when you gently shake it. Allow to cool completely before cutting to serve.
I've passed your blog along to my son's girlfriend who eats gluten free. She'll love you! It's helpful for me too. I can make foods she can eat. :)
ReplyDeleteSo happy to hear it! Stop on by any time!
ReplyDelete